Sunday, August 11, 2013

Livestream


I'll be streaming for an hour or two. Everyone's welcome to pop in and watch.


EDIT: The stream has just ended. Special thanks to my viewers and the wonderful people in the chat! You can still watch the recorded stream at http://www.livestream.com/artistsfieldbook, under “Latest Videos.”


Wednesday, August 7, 2013

Livestream Announcement

There is no post to the blog this week, because I'm setting up to do a livestream this Sunday. I'll be open to answering anyone's art-related questions through video demonstrations for an hour or two, starting at 3:00pm Pacific Time. A link will be provided here, in my DA journal, and on Tumblr before the stream starts. Everyone is welcome!

Tuesday, July 30, 2013

Author Intermission - Awesome Tools!

I introduce to you: Author Intermissions! The purpose of these special posts is to give a few little extra tips or to bring up topics that I realize most young and learning artists won't think to ask about. Hopefully Author Intermissions will encourage further questions based on what I've posted. 


In my post on art materials, I covered some specific tools I recommend for my fellow artists. Today I want to make a sort of addition to that post, and mention some extra accessories that can make your work a little easier.


Pencil extender
Ever get your wood pencil down to a nub and have to cramp up your hand trying to hold the thing?


It's a shame to simply throw it away when there's still so much of the pencil left, but it's just too short to use easily. Meet your solution.


A pencil extender is basically what it says on the tin. You put your stubby little sharpened-down pencil into the holder, and you magically have more to hold when you draw!

General's is the easiest brand of these to find. I think they're a little bit expensive for being a chunk of wood with metal attached, but it's really worth the price, as these things last forever.

Unfortunately, they sometimes don't work too well with the woodless pencils I recommended in the materials post (depending on the brand), but they're perfect with a standard wood pencil.


Erasers
Erasers are probably one of the materials most of us artists pick a favorite for very early on. I still use the same type of eraser I used in middle school. If you have your favorite then by all means, keep it. This is my advice to those of you still using whatever eraser happens to drift your way.

My personal favorite is the Clic eraser. It lasts a long time, and you can really erase fine detail if you know how to use it. Since I work a lot with dark pencil lines, it's insanely valuable to have an eraser that can get into small details, and erases cleanly with no smudges.


There are similar tools, like fine-point drafting erasers and electric erasers. These will work just as well, but Clic is the only one I know of this quality that can be found in general office supply stores, or even drugstores.

For those of you working with rendered (shaded) art, I highly recommend a kneaded eraser. This is the most commonly used type of eraser in the professional world of art. It's like a little ball of clay. You can shape it to a fine point, or flatten it to lift a little bit of value in a large area, and it doesn't leave little eraser bits! I also find them a little relaxing to squish in my hands while I'm working.


Gel Pen
For most of us, hearing "gel pen" makes us think of those horrible little cheap pens packed with glitter and over saturated colors, that see the most use in year books. (I still love those things.) Well, it's time to think of them a little differently.


If you like to work with ink, you might want to try out Gelly Roll's white gel pen. It's basically white-out, in a pen. You can fix mistakes with incredible precision, and it doesn't create an ugly glob of goo on your paper. They go a long way, as well. I find most art stores are carrying them now.

A little gel pen and re-inking will fix that!
Why so unhappy?


Non-Photo Blue Pencil
If you're like me and tend to do lots of heavy sketching before putting in your final lines, you might want to work in blue pencil. When you do your sketching in blue pencil, you can never make your lines anywhere near as dark as a soft graphite or ink line. This way, your final lines will be much easier to see.


Another advantage is that blue pencil is harder for a copy machine or scanner to read. You can easily scan an inked drawing with blue sketch lines underneath, and make some simple tweaks in Photoshop to make the sketch underneath completely vanish. All you're left with is the clean final drawing.

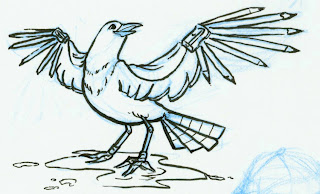
The original, unedited scan of the Field Book bird

Any light blue pencil will work, but specifically non-photo blue pencils are best. My favorite is Staedtler's non-photo blue pencil. Some other brands are a little too dark, and get picked up more easily by copiers and scanners.

Before. . . 

. . .and after some simple Photoshop tweaks


Saturday, July 20, 2013

Question #6 - Proportions in Anatomy

Q: "What are some of the most important proportions to know for human anatomy?"


I want to start off my response by saying this: Anatomy is something that takes years and years of practice to learn and perfect. Don't be stressed when you can't magically draw a perfect figure without these years of drawing under your belt.

However, the perfect book to help you get started on drawing the human figure is Figure Drawing For All It's Worth by Andrew Loomis. The best part? You can download the full book for free here.

Here are a couple examples from this wonderful book:


I could write a hundred posts about human anatomy (and probably will over the course of this blog's existence), but the question for today's post is specifically concerning proportion.

Here's a simple chart I sketched up to show the major proportions you should know.


Some extra tips:

  • The distance from one shoulder to the other is three head-widths.
  • The eyes are halfway between the chin and the top of the head
  • The average figure will be about 7 1/2 head-heights tall 


These measurements will not always be exact, since every human has slightly different proportions, but these are good rough guidelines to follow. When you're drawing from a live model, always measure and re-measure to be sure you get that individual's proportions correct. I've drawn models that measured 6 heads tall, and others that were 8 heads tall.

Characters in animation and illustration will often have very exaggerated proportions, which completely break from these guidelines. While it's tempting to only draw exaggeration and never learn realistic proportion, you will only be able to draw exaggeration well if you know your real-life anatomy.


Even Picasso learned everything he could about anatomy before testing what he could do with exaggeration and stylization.


Thursday, July 11, 2013

Question #5 - The Do's and Don't's of Drawing


It's been a while. I'm trying to get back into the swing of things. I hope this post is worth the wait!

Q: "What are the do's and don't's of drawing?"


(I recommend clicking on images in this post to enlarge them)

DO
  • create a rough "under drawing" before putting in final lines
    • Draw the anatomy underneath the skin (I'll cover some anatomy tips in another post)
    • Know what's happening under the clothes / hair / accessories / etc.
    • Draw all of a partially obscured object or character
  • use reference and do research


  • get into the habit of thumb-nailing more complex drawings


  • have dynamic line work (I'll write more about this in a separate post if someone requests it)

  • practice, practice, practice!
    Work from my first year at art school
    Work from my third year at art school


DON'T
  • get stuck in one style
    • Having a unique personal style is great, but you should learn a variety of styles as well (including realism!)
    • Get inspiration from a variety of artists - fine artists, concept artists, comic artists, animators, illustrators, etc.
© Chris Sanders
© Aaron Alexovitch

© James Gurney


  • assume something won't be useful to know
    • Never stop learning. Inspiration can be found in subjects beyond art


Thursday, March 28, 2013

Question #4 - Fields of Art


Because my response to the last question mentioned a few different areas of art, I decided this question from the list would be the best to answer next.

Q: "What are the different fields of art you can go into?"


This is an excellent question, as most people don't realize just how vast the topic of "art" is. Categorizing fields of art can be a little difficult, but I'll do my best.

Fine Art - Everyone knows fine art. You go to a museum and there's paintings all over the wall. You visit a park and there's a statue of some long-dead soldier riding a horse. This is fine art. It's a broad field, but fine art can generally be defined as pieces of work often made in traditional mediums, created for the sole purpose of being placed on display for people to enjoy. Fine art is usually a painting, a sculpture, or a drawing. It's difficult to make money doing fine art, but because of this, I find that fine artists have an incredible amount of passion for what they do, and they simply live for their art.


Illustration - There's some cross over between illustration and fine art. Illustrations are usually drawn or painted (traditionally or digitally), but they specifically serve the purpose of telling a story of some kind. Illustrators learn how to tell story through their images by using composition, color, and lighting to their advantage. Illustration is most often used for books, but there is some crossover into concept art for film, and comics (or graphic novels) could be considered a branch of illustration.


Concept Art for Film- Concept artists are the creative minds behind everything you see on the movie (or TV) screen. They do the initial design for the characters, environments, monsters, props, vehicles, and costumes of every fantasy, sci-fi, action, horror, or animated film you've seen. They draw hundreds of designs for every detail for the director to choose from. Most of that art ends up on the drawing room floor, but it's all for the sake of creating the best designs possible for the final product.


Concept Art for Video Games - Same as for film, but game artists often have to design even more detail than film artists, because they are designing an entire 3D world for the player to explore. That soldier that just slaughtered you in PvP had to be designed by someone!


Storyboarding - (This is my major!) Storyboards are used to plan every action, camera angle, and camera movement of a movie, animation, video game, or commercial. These are then used as guides for the animators and/or director for actually creating the final product. The quality of the final product relies on the storyboards to display good character acting, composition, and timing.


Animation - There are three types of animators - 2D, 3D, and stop motion. 2D is the traditional method of hand-drawn animation, like Cinderella or The Lion King. 3D animation is created using 3D models in a computer, like Toy Story or Kung Fu Panda. Stop motion is made with physical puppets animated in front of a camera, like Nightmare Before Christmas and ParaNorman. Though the mediums are very different, every animator needs to learn the 12 Principles of Animation in order to make their character feel alive to the audience.


3D Modeling/Rigging - Modelers create 3D models of characters, props, and environments on the computer to be used in films or video games. A rigger is then given the job of creating all the joints and moving parts for those 3D models. These jobs are most often given to two separate people, but I lumped them together because modelers and riggers have to work so closely.


Stop Motion Fabrication - Stop motion is a small industry right now, but fabrication is a BIG job. Fabricators build the physical puppets, sets, and props for stop motion films. These people have to know sewing, carpentry, and a huge variety of craft skills in order to make everything needed for a stop motion film.


I think that's enough of fields of art in film. Let's look at something completely different.


Fashion Design - Fashion designers sketch out concepts for outfits, decide what does or doesn't work, then create the outfit by hand. While the popular fashion designs to publicize are dresses, fashion designers will design any and all kinds of clothing. The clothes you're wearing right now started as a simple concept sketch in a fashion designer's sketchbook.


Graphic Design - Graphic designers create logos, choose the fonts and layout of a product label, or design the whole look for a website. Graphic design is another broad topic, but graphic designers often work freelance, hired only for single projects by a business client.


Industrial Design - This is an even broader topic. Industrial designers can specialize in vehicles, buildings, household appliances, or personal electronics, just to name a few. Generally, industrial design is a combination of art and engineering. An industrial designer's job is to create something that is both functional and visually appealing.


Photography - This one is pretty straight forward. Photographers take photos. However, they don't always simply take pictures of pretty landscapes to hang in galleries. Nature photographers will travel across the world simply to get rare shots of exotic animals. Product photographers specialize in getting the most appealing shot of a company's product - from iPones to Big Macs. Fashion photographers take photos specifically to show off the latest outfits in a fashion magazine. There are a lot of options in photography.


This is really only scratching the surface and generalizing a lot of information, but I think this post is already huge enough.


You know the drill. Any questions or requests to know more, leave a comment!


(Disclaimer: I own none of the images in this post. All images are copyright their original owners)


Saturday, March 23, 2013

Question #3 - Art School Tips

Another question from the wonderfully long list sent to me!

Q: "What are some art school tips? Like getting into art school, being successful, best classes to take, etc."


Getting In

The first step to getting into a good art school is building a strong portfolio. While it's nice to show off your original characters and cartoon styles, the admissions guys at any art school would rather see life drawings. Sketches of your friends, your pets, that old coffee mug you left on your desk last week and never cleaned out. . . These are all perfect things to draw for your portfolio. Your portfolio should be at least 2/3 life drawing, with only a few personal pieces to show off your creativity. We all love to show off our creations, but art schools want to start you off with the basics of form and anatomy. They want to see that you're already getting an early grasp of these things.


Some pieces I would have had in my college entry portfolio.
You want to demonstrate your skills with perspective, life drawing, value, expression, and so on.

There are a few things that the admissions departments get really sick of seeing in portfolios. While there is nothing wrong with drawing these things, admissions departments usually take them as a hint of an artist who isn't serious. As unfair as it is, this is the sad truth.

Things to avoid putting in your portfolio:
  • Fan art 
  • Anime-style drawings
  • Dragons (This one really gets to me, but admissions departments have simply seen too many dragons in portfolios to take them seriously)

It's also a good idea to hunt down some weekend or Summer art programs to help you practice your life drawing and build your portfolio.


Simply the best thing to do for advice on your portfolio is to attend a National Portfolio Day. These are events where representatives from a huge range of art schools around the country will take a look at your portfolio and tell you what you should add or change to get into their school. You can also ask them questions and collect pamphlets on each school you're considering. It's a wonderful way to figure out your options. You can find all the information you need on National Portfolio Day, including their schedule, here: http://www.portfolioday.net/ 

(EDIT: For some reason, the Portfolio Day website seems to not be working right now. Hopefully it will be up again soon. If you want to know when and where your local Portfolio Day will be, leave a comment, and I'll gladly hunt down the information for you.)


Being Successful

There are two sides to being successful in art school: managing the college experience in general, and doing well as an art student. I've watched people struggle in both areas, so here are some tips on both.

College Life -
  • Learn responsibility and independence. Grade school does a lot of hand-holding, but no one in college is going to baby sit you. You won't be constantly ordered and reminded to do homework, you won't have teachers policing the door for students skipping out on class. It's your job to do the work and listen to the lectures. If you don't take this responsibility, you simply fail class and get kicked out. No one will have sympathy for a slacking student. 
  • Stay on good terms with teachers and staff. You never know when you might be in desperate need of their help. Even if you simply hate one of your teachers, always treat them with respect. One day, your future may be in this person's hands. These people were hired to help you, not be your enemy.
  • If living in a dorm or shared housing, always keep your roommate(s) and neighbors in mind. Ticking off your dorm-mates is a good way to get yourself kicked out onto the street, or at the very least a building full of enemies. There's nothing worse than dealing with someone who always yells and blasts music, or has no respect for your half of the room.

As an Art Student -
  • Always accept critique from your teachers. You may not agree with what your teacher says, but it never hurts to consider their advice. Talking back or making excuses for yourself only tells everyone that you don't want to improve. You may hate what your teacher is saying, but the best response is to nod and say, "okay." You don't have to make the changes your teacher advises, as long as you're willing to listen to the advice without argument.
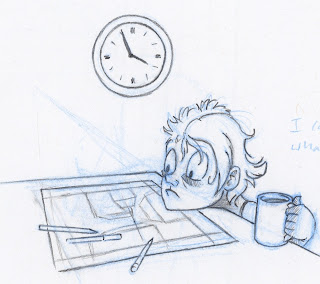
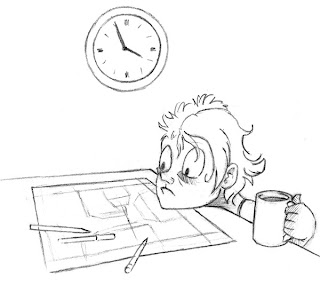
  • Really take the time to do your homework. Some assignments will require 10+ hours of drawing, and your teacher can tell if you trimmed the time short. I'm a procrastinator myself, so I often pull all-nighters and go to class the next day on three or less hours of sleep. If you're a procrastinator too, stock up on enough caffeine and music to get you through the long nights. You WILL have days when you're awake for 24 hours straight.
  • Draw outside of class. Classes teach you a lot, but you should always practice applying what you learn to drawings done in your own time. This is the best way to make sure you're really absorbing the information you're learning in class.
  • Study the work of other artists at every opportunity you get. It's a great way to test what you've really learned. You may soon realize that your opinion of an artist's work has gone from, "That's really nice," to, "I love how the composition brings your eye to the figure, the high contrast and warm colors create a sense of fear, and you can just feel the tenseness in the figure's pose!"
  • Make contacts. Try to stay in touch with the students and teachers you really like. Most teachers will be happy to give you advice and critique beyond class, and may even help you get a job someday. You also never know which of your fellow students may eventually run a prestigious gallery or be head of a company. It's always good to make friends and keep those connections open. (Similarly, try hard not to make enemies for the same reason.)
  • Get to know students within other majors. You might not have much in common with that graphic design student or acting major, but they're always great people to know when you need a voice for your animation homework or a logo for your website. Plus they can give you fantastic insight or pointers that may help you with your own work. 


Best Classes to Take

Every school will have a set curriculum that you will have to follow, so choosing clases will not be difficult. You'll most likely be required to take some form of entry-level still life class, at least one perspective class, and a swarm of figure drawing classes. This may vary depending on your major, but fine art, illustration, animation, and visual development (concept art for film) will all certainly require these classes.

If your school offers any animal drawing classes, I highly recommend taking them. The animal drawing class at my school is not required, but I strongly believe it should be.

Sculpting classes are also incredibly useful. There is a required figure sculpting class at my school, but I don't know if all schools require that non-sculpting majors take a similar class. Sculpting is important for understanding the planes of the human (or animal) figure in 3D space. It's amazing how much this knowledge will improve your drawings. 

Overall, it's simply a good idea to take a wide variety of classes. Try not to get yourself stuck in one small area of art. While it's excellent to be an expert at one thing, it's even better if you know a little of this and that off to the side of our main focus. For example, my focus is storyboarding for animated film, but I've also taken classes in concept art, puppet making for stop motion, and I'm signed up for classes on game design this Summer. You can find more job opportunities after school this way.


As always, comment if you want to know more or have a question!